No products in the cart.: $0.00

A Human-Centered Guide from Vision to Reality
Architectural Lighting Design for Outdoor Projects: A Human-Centered Guide from Vision to Reality
“Good lighting beckons you in, tells a story, and even on the coldest night, makes you feel welcome.”
Since our company started outdoor lighting in 2008, we have been exploring outdoor architectural lighting design, trying to determine where the lamps should be placed “by feeling”, and then observing the building as a whole; we soon realized that excellent lighting is not just as simple as installing a lamp and pressing a switch. It is a subtle art and science – even full of potential pitfalls. In this more “humanized” revised version, I will take you step by step to understand how to turn an outdoor building or square into a dreamlike masterpiece of light and shadow: from the initial conception, to technical details, to economic considerations, and even lessons learned from failure. Along the way, you will see situational guidance, reusable equipment list templates, and explanations of the impact of climate (rain, heat, frost, salt spray) on each decision.
1. Why This Guide Matters: More Than Just Pretty Lights
Many clients come to us with the idea, “We just want to light up the facade so it looks nicer at night.” And indeed, high‐contrast uplights or color‐tunable wash lights can make buildings pop. But architectural lighting is more than “visibility”—it’s about:
1.1)Storytelling & Atmosphere
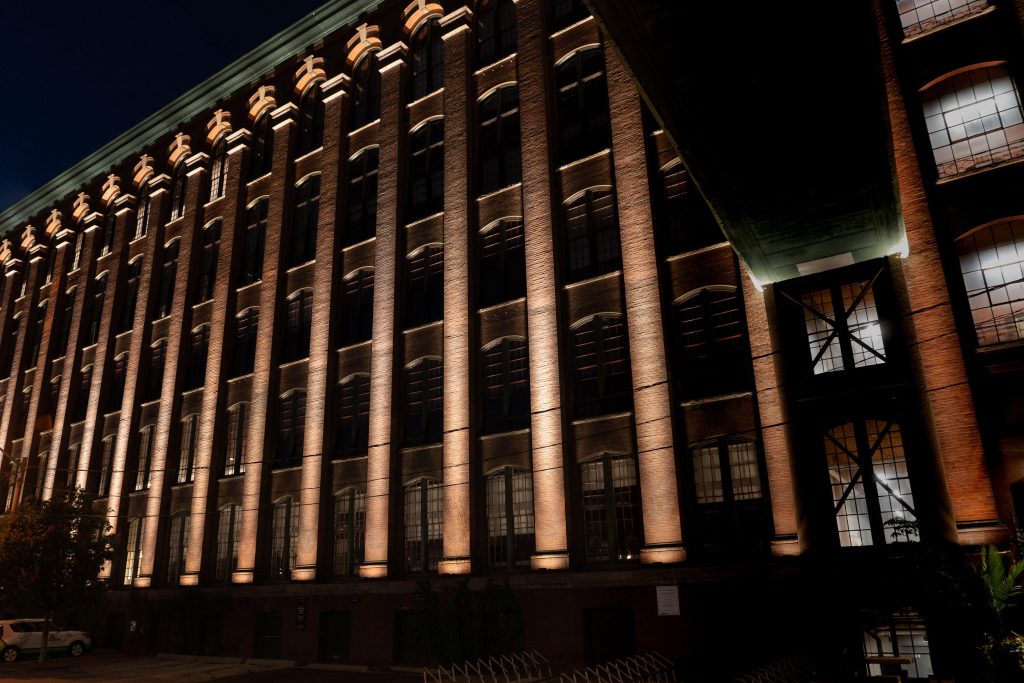
Lighting should amplify architectural intent: a historic brick cathedral wants warm grazing, whereas a sleek, modern office building may demand cool‐white linear accents.
Think of your project as a narrative: inviting a visitor in, guiding their eye up and down, showcasing unique materials.
1.2)User Comfort & Safety
Pathway bollards and low‐glare step lights prevent trips and spills.
Properly designed light levels ease wayfinding: no one should squint or stumble, yet lighting shouldn’t wash out the starry sky.
1.3)Economic & Sustainable Impact
LED fixtures consume 60–80% less energy and last 3–5 times longer than legacy halogen or metal halide lamps.
Thoughtful control strategies (dimming, zoning) can shave 30–50% off a site’s annual energy bill.
A well‐lit building or plaza can boost retail sales, lengthen dining hours, and even give a property a price bump of 5–15%.
1.4)Climate Resilience
Will your fixtures face driving rain, freezing temperatures, salt corrosion (coastal projects), or blistering sun? Every environment demands distinct IP/IK ratings and material choices.
Poorly suited fixtures lead to early failure, maintenance nightmares, and dissatisfied clients.

2. A Real-World Starting Point: Case Scenario
Scenario: The town of Maplewood wants to revitalize its historic downtown square (a 30m × 40m plaza with a central fountain and two adjacent 3‐story brick buildings). They hope to:
1. Draw evening foot traffic for small cafes.
2. Celebrate their colonial‐era architecture.
3. Stay within a modest budget (USD $80,000 total installed).
4. Withstand rain, occasional frost, and heavy pedestrian use in winter festivals.
2.1 First Steps: Site Survey & Contextual Understanding
2.1.1)Site Visit Notes:
Plaza surface: rough‐textured granite pavers, slightly uneven (requires low‐profile bollards instead of flush‐mounted).
Surroundings:
West facade faces a narrow pedestrian street (ideal vantage point).
East facade abuts a small parking lot (visible from passing cars).
Central fountain: shallow pool with stone walls, 5 m diameter.
Weather: average winter lows of −5 °C, summers up to 30 °C, 1,200 mm annual rain.
Vegetation: two mature oak trees on north side, overhanging branches need uplight clearance of at least 3 m.
2.1.2)Architectural Assessment:
Historic brick facades with decorative cornices at ~10 m height.
Rustic cast‐iron lanterns at building entrances (to be retained for day use, integrated at night).
Fountain edge: 0.5 m above grade; water overflow drains to the north.
2.1.3)User Needs & Program:
Weekday dining crowd (6 pm–10 pm), weekend “Thursday nights” live music (outdoor seating).
Winter holiday market (November–January) with temporary stalls—requires flexible lighting zones.
Safety: well‐lit pedestrian flow, no dark corners.
2.2 Translating Insight into Design Goals
By the end of the site visit, our design objectives became clear:
2.2.1)Showcase Historic Texture
Warm‐white grazers (2700 K, CRI > 90) to accentuate brick patterns, cornices, and windowsills.
2.2.2)Create a Welcoming Central Gathering Zone
Soft ambient wash around the fountain (LED downlights in canopy above, plus subtle uplights on the stone wall).
2.2.3)Define Safe Circulation
Recessed step lights at fountain edge; low‐level bollards along sidewalk edges.
Wall washers on facades for gentle vertical illumination, guiding people in from the pedestrian street.
2.2.4)Permit Seasonal Flexibility
A DMX/dimming control system to adjust light levels for summer festivals vs. winter holiday markets.
Temporary “hot‐shoe” brackets for market stall spotlights (plug‐and‐play design).
2.2.5)Stay Within Budget & Embrace Efficiency
Prioritize LED fixtures with proven track records (balanced initial cost vs. long‐term savings).
Incorporate motion sensors on restrooms and service alleys to reduce wasted energy.
3. Crafting the Lighting Concept: Narrative & Layering
3.1 Developing a Guiding Vision
We settled on the concept:
“Warm Hearth & Guiding Glow”
Warm Hearth: The two brick facades appear bathed in gentle amber, celebrating texture as if illuminated by lantern light.
Guiding Glow: Pathways and fountain rim softly lit, drawing visitors into a central communal “hearth.”
This narrative informed fixture selection, aiming to replicate the historic charm (warm 2700 K) yet leverage modern, efficient optics.
3.2 Layering Light: Zones & Functions
3.2.1)Ambient Zone (Fountain + Plaza Floor)
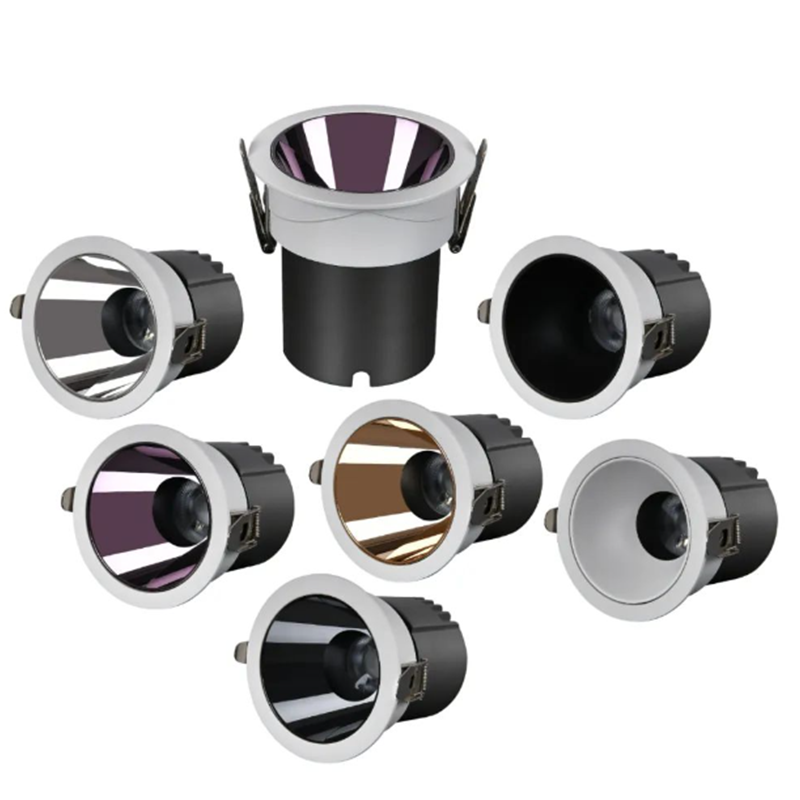
Fixtures: Four LED downlights ( recessed in the overhead canopy over the sidewalk )—each 15 W, 300 mm from fountain edge, 2700 K, 40° beam angle, CRI > 90.
Function: Provide gentle 50–70 lux average at fountain rim for ambient glow during dining hours.
3.2.2)Accent Zone (Brick Facades, Cornices, Window Sills)
Fixtures: Eight linear LED grazers (9 W/m, narrow 15° beams, IP65, 2700 K, CRI > 90).
Placement:
Four on ground 1 m from building base, aiming up at 2 m height.
Four mounted at 8 m height on adjacent roofs, aiming downward (to reduce shadowing).
Outcome: Reveal rough brick texture, highlight cornice shadows, give vertical depth.
3.2.3)Pathway Zone (Pedestrian Street & Sidewalks)
Fixtures: Ten low‐level bollards (IP66, 50 cm tall, 2700 K, integrated diffuser).
Spacing: 4 m intervals along sidewalks, 100 lux peak at grade for safe walkway.
3.2.4)Service Zone (Service Alley, Restrooms)
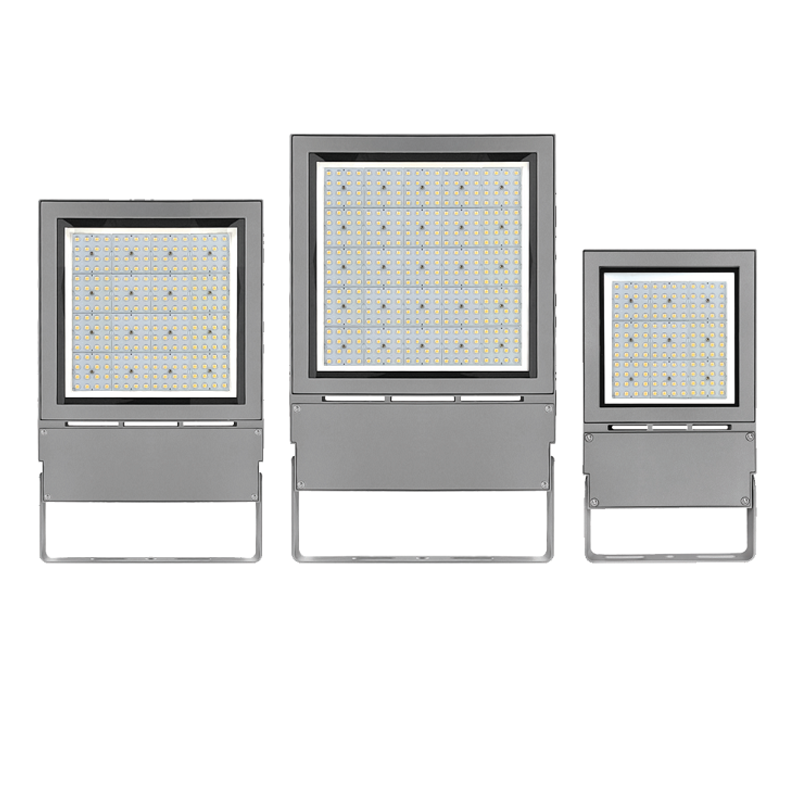
Fixtures: Two motion‐activated wall‐mounted LED floodlights (10 W, 4000 K for contrast, CRI > 80).
Function: Illuminate only when needed—saving energy, reducing stray light onto plaza.
3.2.5)Seasonal/Event Zone (Holiday Market + Music Nights)
Fixtures:
Four plug‐in track light heads (mounted on 3 m‐high portable stands).
Two wireless DMX LED par cans (with barn doors).
Control: Operator can dial up to 100 % output for festive nights, dim to 30 % during calm dinners.

4. Technical & Economic Considerations: Balancing Cost, Performance & Longevity
4.1 Fixture Selection: Beyond Initial Price
When comparing potential vendors, we always run a mini Total Cost of Ownership (TCO) exercise:
|
Fixture Model |
Initial Cost (USD) |
Wattage |
Expected Life (hrs) |
Energy Cost/yr |
Maintenance Cost (5 yrs) |
Total 5‐yr Cost |
|
Linear Grazer A (9 W/m) |
$120/m |
9 W/m |
50,000 |
$15 |
$30 |
$195/m |
|
Linear Grazer B (12 W/m) |
$90/m |
12 W/m |
30,000 |
$20 |
$60 |
$170/m |
|
Bowl Bollard C (50 cm, 10 W) |
$200/each |
10 W |
100,000 |
$10 |
$20 |
$230 |
|
Recessed Downlight D (15 W) |
$85/each |
15 W |
70,000 |
$18 |
$20 |
$123 |
Observations:
Although “Grazer A” costs $120/m initially vs. $90/m (“Grazer B”), Grazer A lasts ~50 % longer and uses 25 % less wattage—reducing energy & replacement fixture costs.
Lesson: Always calculate the “five‐year snapshot,” not just the sticker price.
4.2 Photometric & Energy Modeling
Rather than “guesstimating” lux levels, we used free (trial-version) AGi32 to:
1. Generate Photometric Renderings (simulate warm grazing on brick).
2. Verify Uniformity Ratios (min/avg, 0.3 or higher for pathway safety).
3. Estimate kWh Consumption (plotted hourly load profiles:“Weeknight mode” = 4 hrs at 100 % + 6 hrs at 50 %.“Weekend event mode” = up to 8 hrs at varied intensities).
Based on local utility rates ($0.12/kWh), we projected yearly operating cost for lighting at ~$1,400 (including 20 % increase for holiday runtime).
5. Learning from Failure: “The Frosty Archway” Case Study
Project: A 2 m‐wide pedestrian archway over a main street in Frostville, MN.
Goal: Accent the arch’s limestone carvings with uplights.
Budget: $25,000 (including controls).
5.1 What Went Wrong
5.1.1)Under‐Specified IP Rating
They selected fixtures rated IP65 (protection against water jets) but the region’s freeze‐thaw cycles caused condensation inside sealed housings (cracks formed, moisture built up, LEDs flickered, then died).
5.1.2)Insufficient Beam Control
Narrow spotlights were aimed too steeply, creating hot spots on the arch and leaving large shadows—visually jarring to pedestrians.
5.1.3)Lack of Dimming/Zoning
All uplights were on a single circuit at 100 %. During slow weekday evenings, the glare was too intense, discouraging foot traffic (residents complained).
5.1.4)No Maintenance Access Plan
Fixtures were embedded in granite curb at ground level. When one failed, maintenance crews had to jackhammer the curb to extract it—excessive labor, high repair cost.
5.2 Postmortem Lessons
IP67+ or IP68 in Freeze/Thaw zones: The next iteration used IP68‐rated stainless steel fixtures with sealed cable glands and desiccant packs to avoid internal condensation.
Optics & Aiming: Swapped 15° spots for 30° asymmetrical beam lights, moved fixtures 2 m back—softer wash, fewer shadows.
Zoned Controls: Introduced two zones (arch and adjacent walls). Midweek: only 50 % output on arch; weekends: 100 %.
Maintenance Plan: Relocated fixtures into 10 cm‐deep precast concrete sleeves with removable caps—irreversible fixture removal became a thing of the past.

6. Climate‐Smart Tactics: Designing for Rain, Heat, Cold & Salt Air
|
Climate Factor |
Impact on Lighting |
Best Practice |
|
Heavy Rain |
Water ingress, corrosion of metals |
IP66–IP68 rated, marine‐grade stainless 316 housing, sealed connectors (gel‐filled). |
|
Freezing/Frost |
Condensation, ice expansion inside fixture |
Use IP68; desiccant packs; auto‐draining housings; rubber gaskets tested to −40 °C. |
|
High Heat |
Thermally induced lumen depreciation (>30 % loss) |
Fixtures with high‐temp polycarbonate/IP65; heatsink mass; ensure 10 °C clearance. |
|
UV & Sunlight |
Plastic yellowing, gasket degradation |
UV‐stabilized polymers, silicone gaskets, anodized/aluminum finish with PVD coat. |
|
Salt Air (Coastal) |
Accelerated rusting, seal failure |
Marine‐grade 316L stainless, silicone cabling; no ferrous exposed parts. |
Tip: If your project is near a shoreline or in a highly humid environment, specify “marine‐grade” or “salt‐spray tested” fixtures (e.g., ASTM B117 + 1,000 hr minimum).
7. Equipment List Template & Cost Tracking
Below is a reusable template you can adapt for any outdoor lighting project. Duplicate columns horizontally for each fixture category; fill in “Quantity,” “Unit Cost,” and “Total Cost.”
|
Item |
Model/Spec |
Qty |
Unit Cost |
Total Cost |
IP/IK Rating |
CCT & CRI |
Mounting/Placement |
Control Zone |
|
Linear LED Grazer |
9 W/m, 2700 K, CRI > 90, 15° beam, IP65 |
50 m |
$120/m |
$6,000 |
IP65 |
2700 K / 92 |
Ground‐mounted, 1 m from wall |
Wall Accent Zone |
|
Architectural Wall Washer |
20 W, 300 mm lens, 2700 K, CRI > 90, IP65 |
16 |
$75 |
$1,200 |
IP65 |
2700 K / 90 |
8 m height on parapet, 5 m apart |
Facade Illumination Zone |
|
Bollard (Low‐Level Path Light) |
50 cm, 10 W, 2700 K, CRI > 90, IP66 |
12 |
$200 |
$2,400 |
IP66 |
2700 K / 90 |
4 m spacing, along sidewalks |
Pathway Zone |
|
Recessed Downlight (Fountain Ambient) |
15 W, 2700 K, 40° beam, CRI > 90, IP68 |
4 |
$85 |
$340 |
IP68 |
2700 K / 92 |
Recessed in overhead canopy, 0.5 m from rim |
Fountain Zone |
|
Wireless DMX LED Par Can |
50 W, fully dimmable, RGBW, IP65 |
2 |
$250 |
$500 |
IP65 |
RGBW, Tunable |
Portable stands for events |
Seasonal/Event Zone |
|
Plug‐in Track Light Head |
30 W, 2700–4000 K, CRI > 85, IP20 |
4 |
$60 |
$240 |
IP20 |
2700–4000 K / 85 |
On portable DJ stands for markets |
Seasonal/Event Zone |
|
Motion‐Activated Wall Floodlight |
10 W, 4000 K, CRI > 80, IP65 |
2 |
$45 |
$90 |
IP65 |
4000 K / 85 |
Above service entrance, 5 m high |
Service Zone |
|
Electrical & Control |
|
|
|
|
|
|
|
|
|
Outdoor LED Driver (DMX Compatible) |
24 V, 6 A, IP67 |
2 |
$120 |
$240 |
IP67 |
N/A |
Central control cabinet in utility room |
All Zones |
|
Control Panel (DMX + Astronomical Clock) |
12‐channel, Wi‐Fi, touchscreen |
1 |
$1,500 |
$1,500 |
IP54 |
N/A |
Mounted in electrical closet |
All Zones |
|
Conduit & Junction Boxes (Sch. 40 PVC) |
|
* |
* |
* |
IP66 |
N/A |
Concealed in sidewalk and planters |
N/A |
|
Miscellaneous |
|
|
|
|
|
|
|
|
|
Cables (MIN 18 AWG, outdoor‐rated) |
0.5 USD/ft |
500 ft |
$250 |
$250 |
N/A |
N/A |
Buried in conduit or surface runs |
N/A |
|
Mounting Brackets & Anchors |
316 stainless steel, V‐brackets, etc. |
1 kit |
$200 |
$200 |
N/A |
N/A |
As per fixture instructions |
N/A |
|
Labor & Contingency |
35 % of total equipment cost |
|
|
$3,000 (approx) |
N/A |
N/A |
N/A |
N/A |
|
Totals (Equipment + Labor) |
|
|
|
$16,000 (example) |
|
|
|
|
How to Use the Template:
1. Copy the table into your own budget sheet.
2. Adjust “Qty” based on your site dimensions.
3. Replace “Unit Cost” with vendor quotes (include freight & taxes).
4. Factor in a 30 % contingency for small projects (50 % for complex, historic‐preservation sites).
5. Tally “Labor & Contingency” to cover excavation, trenching, wiring, aiming, commissioning.
8. Visual Communication: Sketches, Simulations & Mock‐Ups
8.1)Conceptual Sketches & Mood Boards
A simple hand‐sketch showing “yellow‐orange uplights at cornice” and “soft blue pool wash.”
Mood‐board collage:
Photo of a warm‐grazed brick wall.
Example of a lantern‐style bollard.
Sample lighting control interface screenshot.
8.2)Photometric Renderings
Use AGi32, Dialux, or similar to simulate how 2700 K grazer beams play over rough brick at 6 m.
Show “Plan View” lux isolines for pathways (target 50 lux average, uniformity 0.4).
8.3)Daylight vs. Nighttime “Before & After”
Photograph façade at twilight with no lighting.
Overlay a composited “after” showing gradual fade from warm uplight (1 cd/m²) to cool ambient (0.2 cd/m²) at ground.
8.4)Mock‐Up on a Small Scale
Before committing to 50 m of grazers, try a 2 m segment on a similar brick sample (rent 10 W spot with 15° lens).
Photograph at dusk—invite client feedback (too warm? Too narrow beam?).
9. Installation & Commissioning: Bringing Light to Life
9.1 Pre‐Installation Coordination
9.1.1)Stakeholder Walkthrough:
Coordinate with landscape architect: preserving root areas for uplights under oak trees.
Check for hidden utilities before trenching for bollard cabling.
Secure permits from Maplewood code office: no upward light above 1 fc at property line (Dark Sky compliance).
9.1.2)Material Verification:
Confirm fixture labels (check barcodes against PO).
Inspect for shipping—no cracked lenses, no missing power supplies.
Ensure gaskets & O‐rings have proper lubrication (silicone spray) to avoid dust ingress.
9.2 Fixture Mounting & Wiring
9.2.1)Recessed & In‐Grade Fixtures:
Set four fountain downlights in precast concrete sleeves, ensure 5 mm grated stainless‐steel cover.
Seal sleeves with non‐shrinking grout.
9.2.2)Ground‐Mounted Grazer Trenches:
Excavate 200 mm deep × 300 mm wide trench, bed of pea gravel for drainage, 50 mm conduit below.
Run low‐voltage cable (18 AWG), 2 m pigtail for aiming.
Backfill with compacted sand, then topsoil to minimize settlement cracks.
9.2.3)Bollard Installation:
Footings at 60 cm deep, PVC conduit mandrel.
Mount bollards on adjustable brackets (to level after frost heave).
9.2.4)Control Cabinet & Panel:
Install DMX control panel in weatherproof NEMA 4X enclosure.
Mount timer/dusk‐to‐dawn relay for service zone floodlights.

9.3 Nighttime Commissioning & Fine‐Tuning
9.3.1)Dark‐Sky Calibration:
Measure light trespass at property boundary (goal ≤ 0.2 fc).
Verify that uplights don’t spill onto office windows at 20 m distance.
9.3.2)Aim & Adjust:
Walk primary sightlines: pedestrian approach, driver view from main artery.
Tilt groceries down 1 °–2 ° to reduce glare; tighten barn doors to block spill onto café windows.
9.3.3)Control Programming:
“Dining Mode” (6 pm–10 pm):
Fountain zone at 70 %.
Facade grazers at 80 %.
Bollards at 100 %.
“Festival Mode” (Thu, Fri, Sat, 5 pm–Midnight):
Par cans at 100 % RGBW color wash (warm corner), timed chase for DJ sets.
“Sleep Mode” (Midnight–5 am):
Only bollards at 20 % for security, service floods off, grazers at 10 %.
10. Maintenance & Long‐Term Value
10.1)Routine Cleaning (Every 6 Months)
Wipe lenses with mild detergent; rinse sediment off recessed fixtures.
Inspect gaskets, re‐lubricate O‐rings.
10.2)Annual Electrical Check
Test cable insulation resistance (Megger test) to detect moisture ingress.
Verify driver output voltage remains within ±5 % of spec.
10.3)Fixture Adjustment Post‐Winter
After spring thaw, re‐level bollards (soil heave can tilt them).
Re‐aim grazers if settlement created new shadow lines.
10.4)Component Replacement
LED modules rated 50,000 hrs ⇒ ~10 years of operation (assuming 4 hrs/day).
Replace drivers every 7 – 10 years (or as soon as flicker observed).
10.5)Updating Controls & Software
Check control panel firmware annual updates.
Save and backup DMX scene files to cloud or USB.

11. Frequently Asked Questions (Expanded with Human Insight)
11.1) “Can my electrician handle this, or do I need a lighting designer?”
Electricians excel at trenching, conduit, wiring and ensuring code compliance. But unless they have specialized lighting‐design training, they may not understand optics (beam angles), photometrics (lux uniformity), or how to avoid glare and light trespass. A lighting designer bridges the gap between safety and aesthetics.
11.2) “How do we fit this into a tight budget?”
Prioritize Key Elements: Decide what’s “must‐have” vs. “nice‐to‐have.” The façade grazing is non‐negotiable if the brick detail is your main beauty point. A small set of plug‐in par cans for events can be borrowed or rented.
Phased Installation: Maybe Phase 1 covers permanent fixtures (grazers, bollards, downlights). Phase 2 (par cans, seasonal fixtures) can be added once revenue from evening dining kicks in.
Rebates & Incentives: Many utilities offer LED rebates—apply early to offset fixture cost.
11.3)“What if we want color‐changing effects?”
Mix “tunable white” modules (2700 K–4000 K) with some accent RGBW fixtures.
Keep color‐changing to a limited “Event Zone”—avoid making historic brick look like a nightclub every night.
11.4)“How do you calculate ROI for architectural lighting?”
Increased Lease Value: Studies show amenity‐rich properties can lease 5–10 % above similar unlit ones.
Utility Savings: The switch from legacy halogen to LED usually yields payback in 2–3 years (assuming 10 hrs/night of operation).
Extended Operating Hours: If restaurants can seat diners until 11 pm instead of 9 pm, that’s incremental revenue.
11.5)“Are there any risks to adding lighting to a historic building?”
Anchoring & Penetrations: Drilling into heritage masonry may require specialized anchors or lime‐mortar repairs.
Visual Impact Studies: Many preservation boards require a “mock‐up” phase: erect temporary fixtures for 2 weeks, photograph from several angles, and prove that the new lighting doesn’t detract from architectural integrity.
Reversibility: Always install non‐invasive mounting methods (e.g., straps, surface conduit) so fixtures can be removed without permanent damage.
12. Wrapping It All Up: Beyond “Just Another Shine”
Designing outdoor architectural lighting is not a “one‐night‐stand” with flicking a switch. It’s an ongoing relationship between a building, its environment, the people who use it, and the seasons that test its durability. By weaving together:
1. A Compelling Vision (what story we want to tell at dusk),
2. Real‐World Scenario Guidance (how Maplewood’s plaza came to life),
3. Economic & Climate Strategies (cost‐effective, frost‐resistant fixture choices),
4. Technical Rigor (photometric analysis, IP/IK specifications),
5. Failure Lessons (the Frostville arch redux),
6. Maintenance Roadmaps (annual checks, firmware updates),
we ensure that the final installation is more than lit—it’s alive, evocative, safe, budget‐friendly, and resilient.
Remember: A well‐lit building or plaza doesn’t just look good in Instagram posts; it fosters community, drives business, and becomes a source of pride. When you embark on your next outdoor lighting project, treat it as you would any compelling work of art: research your canvas, choose your pigments (fixtures and optics) wisely, test your mock‐up strokes, and never underestimate the power of a “warm glow” on a chilly evening.
Illuminate Your Building’s Future Now with Asia Pacific Lighting.
We are a 17-year-old outdoor lighting source factory. Our main products are outdoor wall washers, linear lights, floodlights, point light sources, and other lamps. We generally adhere to providing customers with safe, reliable, and cost-effective products, and we have always paid attention to the protection of LED lamps. We can provide DC12V, DC24V, and AC220V lamps according to customer needs, and we can also provide customized lamps. If you have lighting project needs, please contact us.